If your printer runs out of one color of ink, it's an easy matter to take out the empty cartridge and replace it with a full one. But if your printer runs out of multiple colors at the same time, and you remove all of them at once, you may not remember the proper order of the colors. If you load the wrong color in the wrong slot, the printer will not work.
The quickest way to find out the correct order of the ink
cartridges is to access the ink levels information. The following steps are for an Epson printer, but you can follow similar steps for other printer brands. (Consult the printer manual for more information.)
Be sure your printer is on and connected to the
computer before you start.
Windows
- Click on the Start button and choose Devices and Printers
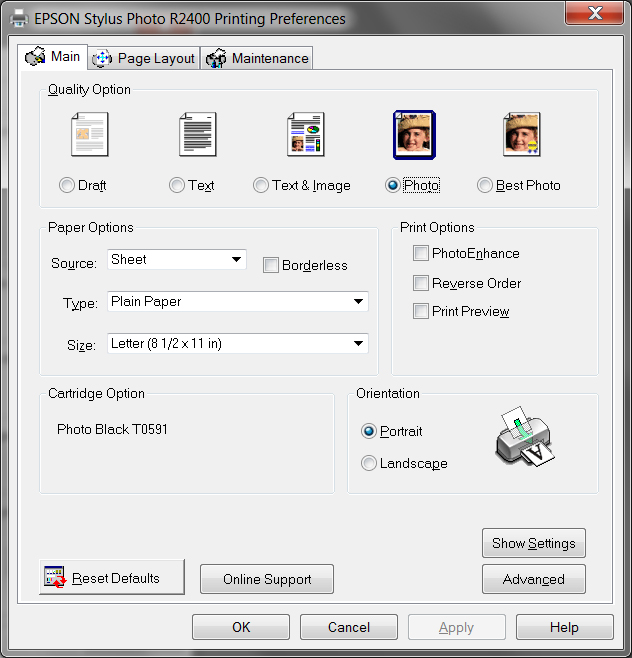
- In the window, right click on the printer and choose Printing Preferences.
- Click on the Maintenance tab.
- Click on the Status Monitor icon.
Mac
- Open a Finder window.
- Choose Applications.
- Select Epson Printer Utility and then your printer model.
- Click on the Status Monitor
You'll see a graphic displaying the ink cartridges and how much
ink remains in each. These appear in the same order as they
are in the printer. Replace the cartridges in the correct order.
 |
| Windows 7 Devices & Printers with Epson printer selected |
|
|
|
 |
| Epson Printing Preferences main screen |
 |
Epson printer maintenance screen
showing Status Monitor at the top |
 |
| Epson Status Monitor showing ink colors in order |
In the future, when you need to replace multiple ink cartridges, take out only one cartridge at a time. That way you won't get
confused about which cartridge goes where!