I recently read a new book from colleagues Gabriel Biderman and Tim Cooper called
Night Photography: From Snapshots to Great Shots (Peachpit Press, 2014). Along with fantastic advice about equipment, exposure and creative techniques for after the sun goes down, the book includes a last chapter with tips on processing your nocturnal images. There I read an easy way to improve the impact of car trail photos. While the directions use Lightroom and Photoshop, I discovered that with a minor change, I could create the same effect using Photoshop Elements. So for all my budget-minded friends, here's how to create the same effect using Elements 9 or newer.
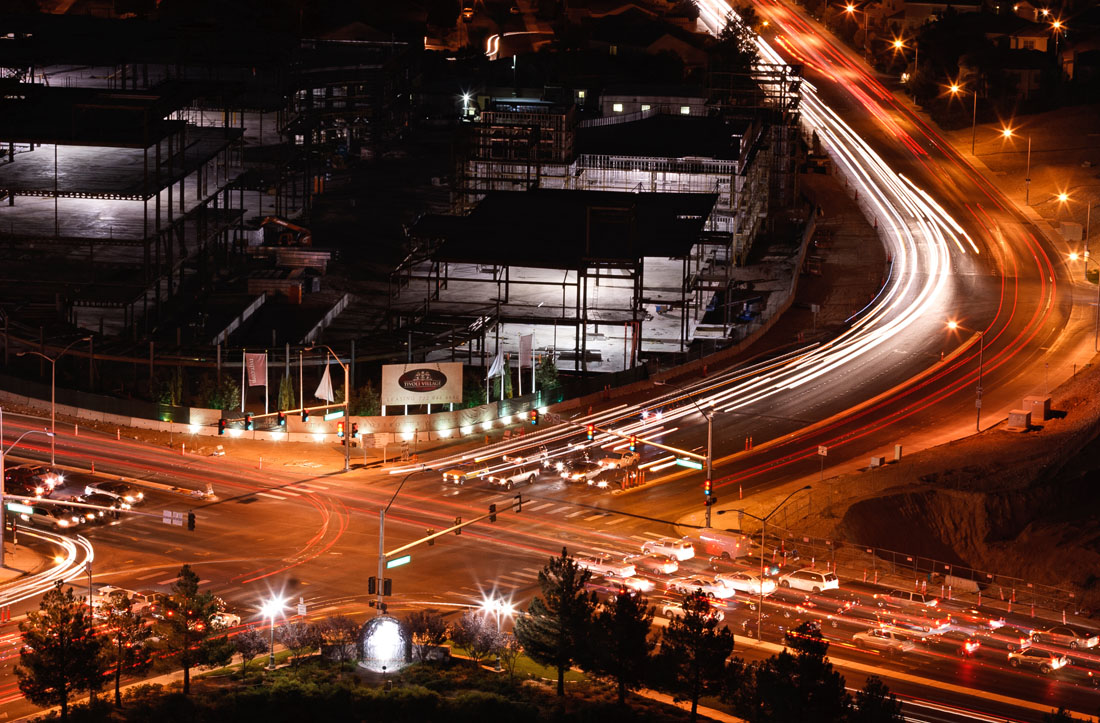 |
Stacked images of car trails
Las Vegas, Nevada |
|
Read more...
Preparing the Photos
It's preferable to capture your night photos of car headlights and taillights in raw format and from a tripod. These two techniques provide you with several advantages:
- Raw files capture more data and provide flexibility with white balance changes to fine-tune the color of your night shot.
- A tripod is required for a sharp shot at the long exposure times necessary to record the lights of passing vehicles.
- Shooting from a tripod ensures your images will all line up when you combine them later in the Elements Editor.
Below you see the three photos I captured on a trip to Las Vegas, NV, several years ago. I was disappointed that there was not much traffic on the street the night I had access to a high vantage point. So even though my exposures lasted between 4 seconds (first two frames) and 10 seconds, there weren't enough cars passing to fill the roadway with lines of light. Fortunately, I didn't erase the frames from either my memory card or my hard drive. Now I have a way to improve them!
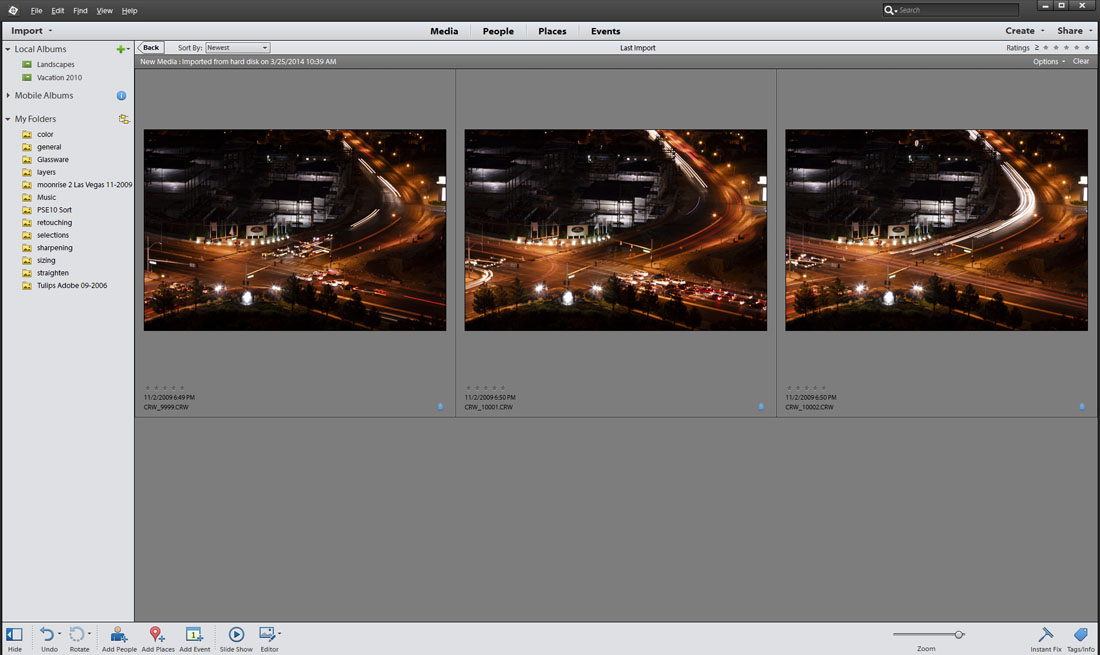 |
| Original raw car trail shots in Photoshop Elements 12 Organizer |
Before combining the frames, process all the pictures in Adobe Camera Raw (ACR) for the same white balance, sharpening, noise reduction, shadows, etc. The easiest way to do this in the Organizer is select all the pictures you want to combine, then click the Editor icon. This automatically starts Camera Raw and includes all your photos in a strip along the left side of the work area. Click the Select All button at the top of the strip and make any of your desired changes. However, do not do any cropping. You can crop after the images are combined.
I adjusted the White Balance of all three pictures to fluorescent (from tungsten) to clean up the colors away from the streets where the car trails were. When you are satisfied, click the Open Images button to bring the photos into the Editor.
 |
Images opened in Camera Raw
White Balance adjusted to fluorescent |
|
|
 |
| Three adjusted images open in the Editor |
Stacking the Photos
NOTE: To accomplish this step you need to have Photoshop Elements 9 or newer. In version 9, Adobe included the ability to add a layer mask to a pixel (image) layer. (Before this the only masks available were on adjustment layers.) You may want to use a mask to hide parts of some frames from the final composite.
In Elements 12, click the Enhance menu and choose PhotoMerge, PhotoMerge Panorama. (In Elements 11 and older, click the File menu and choose New, PhotoMerge Panorama.)
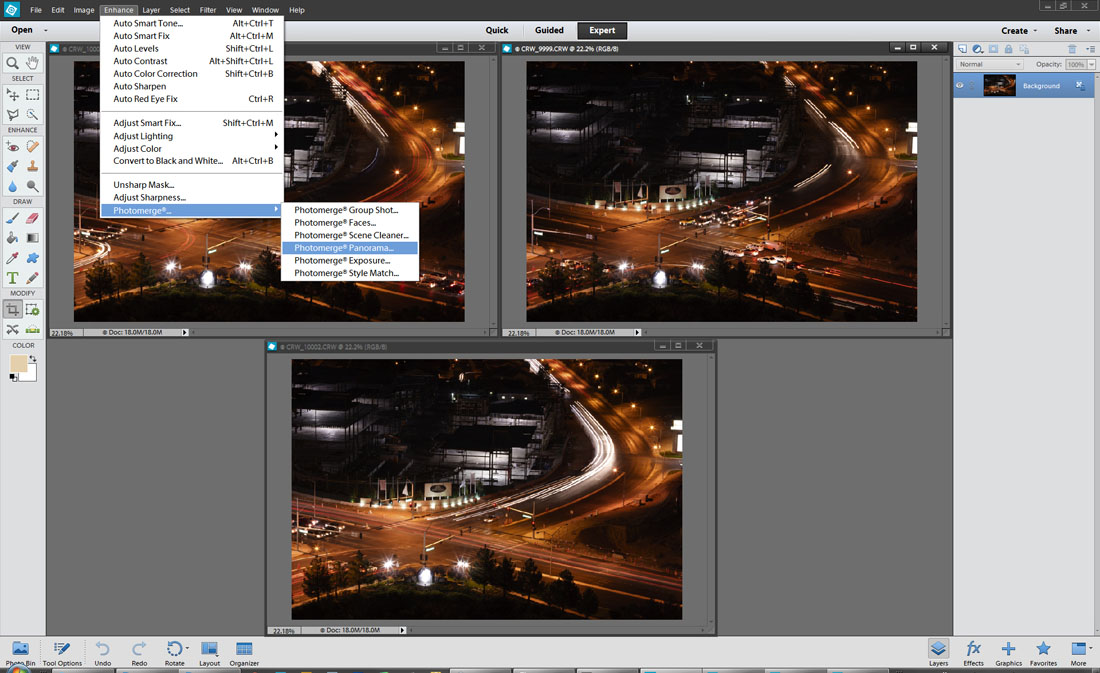 |
| Start PhotoMerge Panoram |
In the Panorama window, make the following choices:
- For Layout select Auto
- For Use select Files
- Click Add Open Files
- Check Blend Images Together
- Click OK
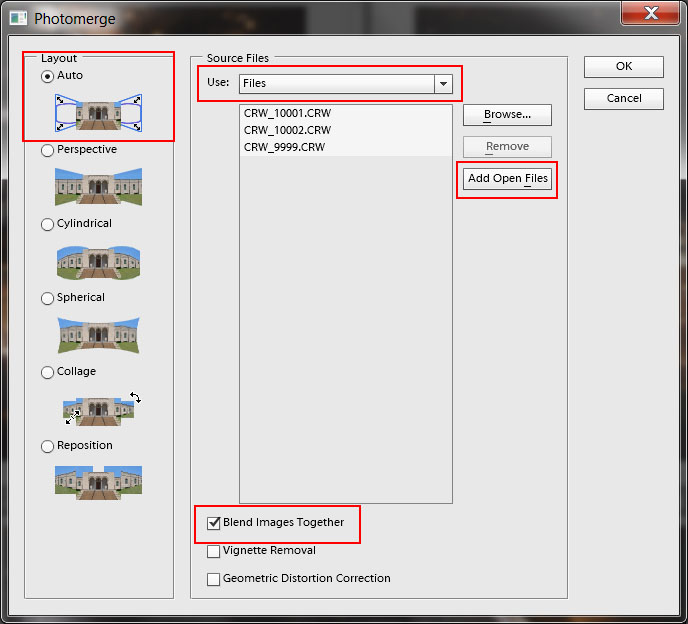 |
| PhotoMerge Panorama choices |
Elements combines all the images into one document and aligns the photos. When it has completed this processing, a new window appears, asking if you want to automatically fill in the edges of the panorama. Since you are stacking images, not stitching them together, click No.
Because I shot all three frames from a tripod, there is almost no misalignment between shots. So when Elements attempts to automatically match one image with the next, they end up stacked one on top of the other, just what I want.
The new document has multiple layers, one for each file, and each has a layer mask. The top layer masks are black, hiding all the information from these photos and showing only the picture on the underlying Background layer. To reveal the additional car trails, you need to make a few easy changes.
 |
| Three photos stacked with layer masks hiding the top two layers |
Revealing Additional Car Trails
Follow these steps to reveal the car trails from the other two pictures:
- In the Layers panel, click on the top layer to select it.
- Click on the word "Normal" and change it to "Lighten."
This is called a blend mode and instructs Elements to allow only the lightest parts of this image to show through to the layer below.
- Click on the mask (the black rectangle) to select it.
- Press Ctrl + I (Windows) or Cmd + I (Mac) to invert the mask color from black to white.
(Or from the Filter menu, choose Adjustments, Invert).
 |
Top layer set to Lighten
Mask inverted to white to reveal this picture |
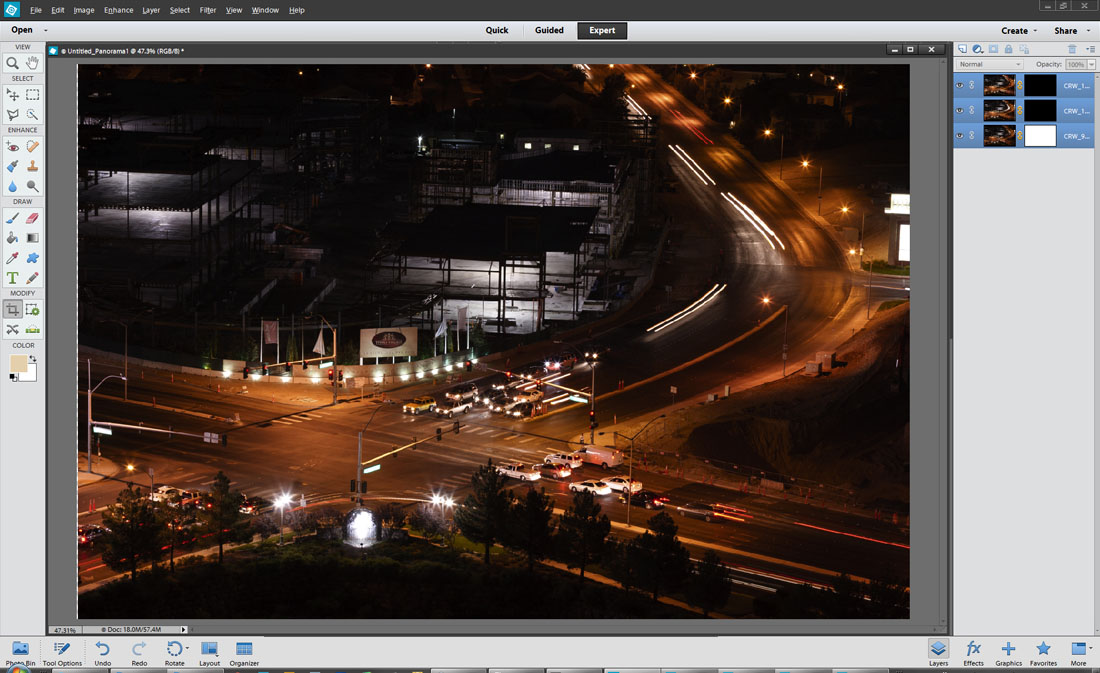
Repeat these four steps for all the additional layers except the Background layer. Now all the car trails from each of the three photos are visible. If necessary or desired, use the Brush tool with black paint and paint on a mask to hide parts of the car trails from that layer. In this example, I did not do any painting in my example photo.
 |
Top two layers set to Lighten
Layer masks inverted to white |
Save this as a new document in Photoshop format to preserve the layers. If you want to crop or perform other adjustments to the combined photos, you may want to save a second copy as a TIFF file. Flatten the layers and then work in either the Elements Editor or open the TIFF file in Camera Raw for additional processing.
Sit back and admire your work when you are finished and share it with your friends!
Adapted from Night Photography: From Snapshots to Great Shots by Gabriel Biderman with Tim Cooper
