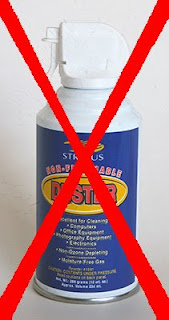
If you have a digital camera with interchangeable lenses (called an "SLR" for Single Lens Reflex), such as a Canon Rebel or Nikon D40, you may have noticed black spots or specks in your pictures when you looked at them large on a computer screen or even after you had the images printed. These black spots are dust sitting on the protective filter covering the sensor in your camera. When you change lenses (and even if you don't), it is possible for dust to settle on the sensor and stay there for every succeeding frame. While you can retouch these spots with your favorite photo editing program, it is time consuming. Here are some tips to prevent unwanted dust and to deal with it if some gets on your sensor.
Prevention is better than a cure in all cases. First, if you are shooting in a location with lots of dust, do NOT change lenses! At the wild west rodeo or the breezy desert or ocean beach, keep the lens on the camera. If the sensor isn't exposed to dust in the first place, you won't have to worry about it. If you must change lenses, return to your car and change the lenses inside the protected space.
Second, always turn off the camera before changing lenses. When the camera is powered up, the sensor creates a small static electric charge which can attract dust, pollen and other floating debris. If you turn off the power, the static charge dissipates and lessens the likelihood of getting more dust on the sensor.
Third, when you do change lenses, do so as quickly as possible to avoid exposing the sensor to the air for any length of time. Here's a routine to practice: A) Turn off the camera. B) Select the new lens you want to mount on the camera and remove its rear lens cap. C) Remove the lens on the camera. D) Attach the new lens. If the camera is on a tripod, this is easy to accomplish. If you are handholding the camera, make sure you have a safe place to lay the first lens when you attach the second lens.
Check your sensor for dust before trying to clean it. The easiest way is to photograph a plain, white or light-colored surface, such as a clear blue sky or a blank wall.
- Set the camera to Aperture Priority exposure mode (A or Av on your exposure dial).
- Select the largest f-number available, usually 16 or 22. This will ensure that any dust spots are sharp and dark enough to be visible.
- Turn off the Autofocus setting; it won't be able to focus on a blank sky or wall without details.
- Photograph the sky or wall.
- Download the picture to your computer.
- Open the photo in any picture viewing software
- Display the picture at 100% or Actual Pixels size.
- Scroll carefully through the whole photo, checking for spots.
- If you don't see any, no need to clean the sensor! If you do see some spots, you can proceed to the cleaning stage.
If you are willing to try cleaning your sensor yourself, here are some easy steps. NOTE: Perform these steps at your own risk. If you damage the camera sensor, you may void the warranty.
The first method is to use a large bulb blower to blow dust off the camera sensor. You can purchase a Rocket Blower or Hurricane Blower at most camera stores, or simply find a large bulb blower at your local pharmacy.
- Be sure you have a fully charged battery in the camera.
- If your camera has a sensor cleaning menu choice, select this. Otherwise, turn on the mirror lock-up function. (Consult your camera manual for instructions.)
Both of these menu choices flip the mirror up out of the way so you can see the camera sensor. - Remove the camera lens.
- Hold the camera securely with the lens opening pointing down so the loose dust can fall out of the camera.
- Carefully insert just the tip of the blower just inside the lens mount. DO NOT TOUCH THE SENSOR with the tip of the blower.
- Give two or three firm blasts of air to dislodge any dust.
- Turn off the camera to cancel the sensor cleaning/mirror lock-up.
- Check your results on the computer by photographing the plain sky or wall again.

If the blower method does not completely clean your sensor, you may advance to wiping off the sensor with a dry or wet method. I use a special sensor cleaning brush from Visible Dust called the Arctic Butterfly to clean the sensor in my camera. This battery-powered brush is small, light and contains no liquids so it's safe to carry on airplanes. The battery causes the brush to spin, creating a static charge which attracts dust. Then you turn off the spin and gently wipe the brush across the surface of the sensor. Remove the brush from inside the camera and spin again to remove the dust. You can see specific instructions and a video on this method at the Visible Dust web site.
If your sensor has stubborn spots stuck to its surface, you may need to use a special solvent and cleaning wand to clean up the mess. VisibleDust sells these tools also, but I have not had to use them.
There is a web site dedicated to discussing and demonstrating a variety of sensor cleaning methods. For in-depth information on cleaning your sensor, visit www.cleaningdigitalcameras.com.
With a little care and forethought, you should be able to keep your digital camera's sensor clean for pristine photos.
