When Adobe released Photoshop Elements 12, they
finally included a long-missing feature: the ability to automatically
fix "pet eye"! This changes the Red-Eye Removal Tool from looking for red pixels to looking for the green, blue, or yellow discoloration found
when our camera's flash reflects off our pet's eyes.
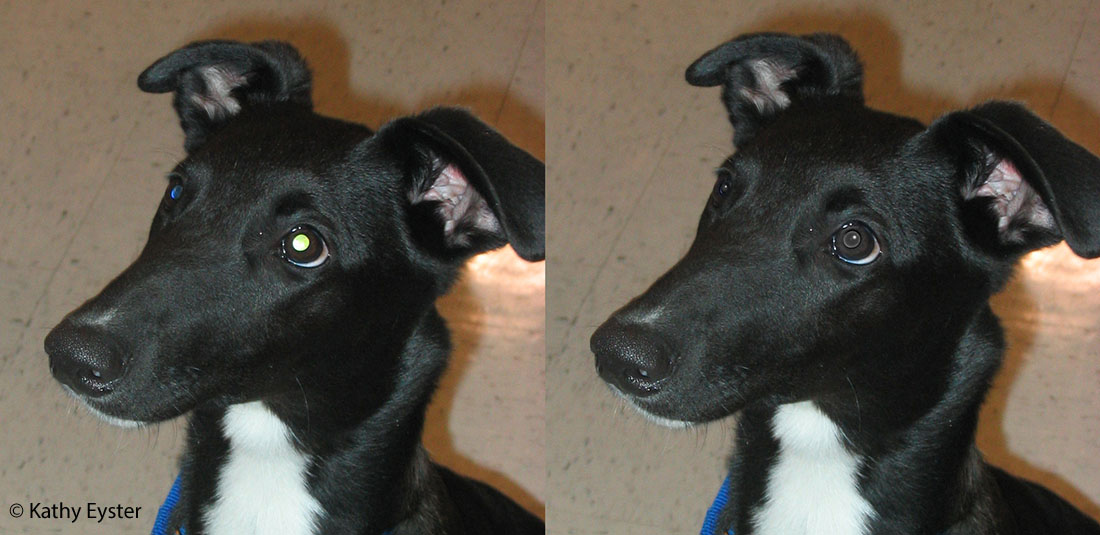 |
| Before and after using the Pet Eye option of the Red Eye Removal Tool |
|
|
Read more...
Here's how to use this tool.
- Open a photo of a favorite animal that has pet eye.
- Select the Red-Eye Removal Tool.
- At the bottom of the screen, click the Tool Options button to reveal the settings for this tool.
- Check the "Pet-Eye" box.
- Zoom in to 100% (View >Actual Pixels) on your pet's face.
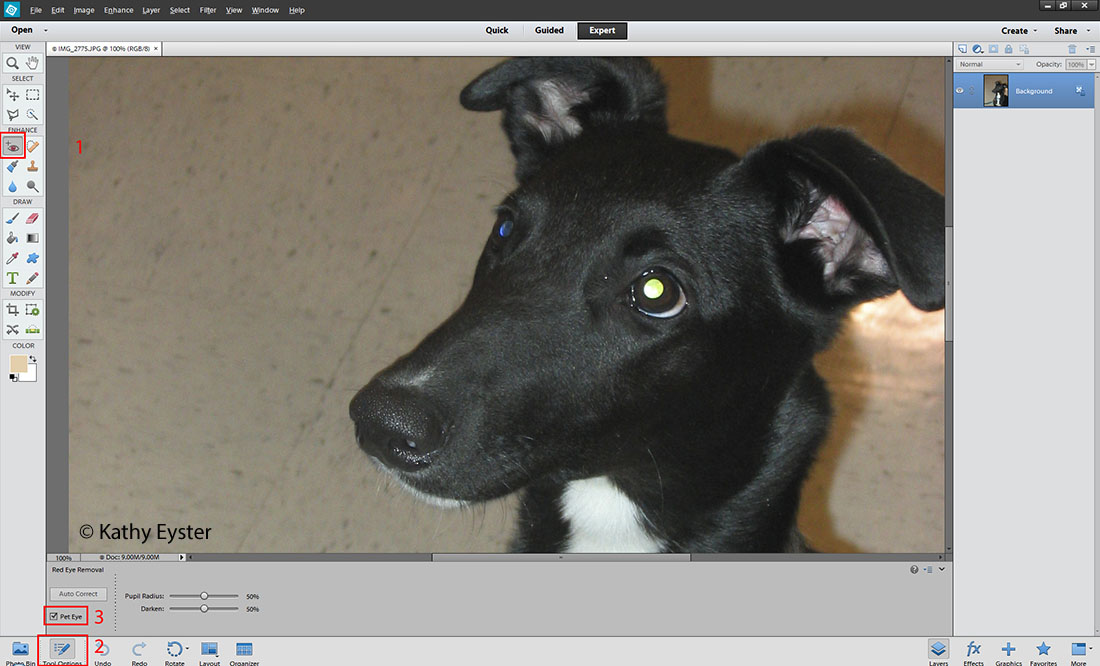 |
Setting up the Red Eye Removal Tool to fix Pet Eye
in Photoshop Elements 12 |
- Click on the discolored eye for repair.
- If you don't get the results you want, click the Undo button.
- Then adjust the Pupil Radius and Darken sliders and try again. Slick!
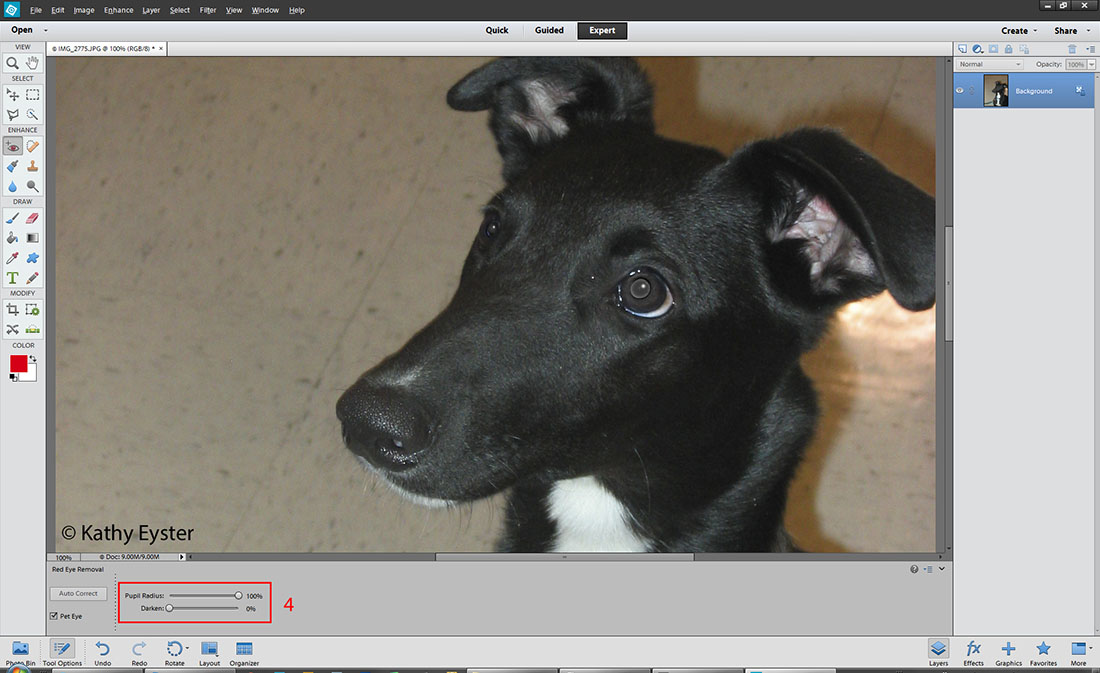 |
| Adjusting the sliders creates a better repair of the dog's left eye. |
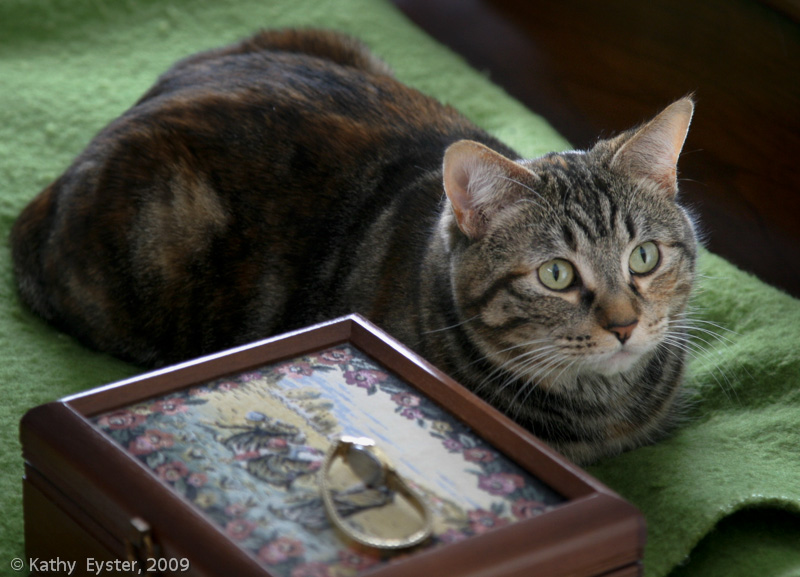
This tool worked great on the round eyes of the puppy but not so well on the "almond" shaped pupils of my cat's eyes. The tool changed the green to black but the shape of the repair didn't match the shape of the eyes. So for some images you may still need to repair pet eye manually. Read how in my
earlier post.
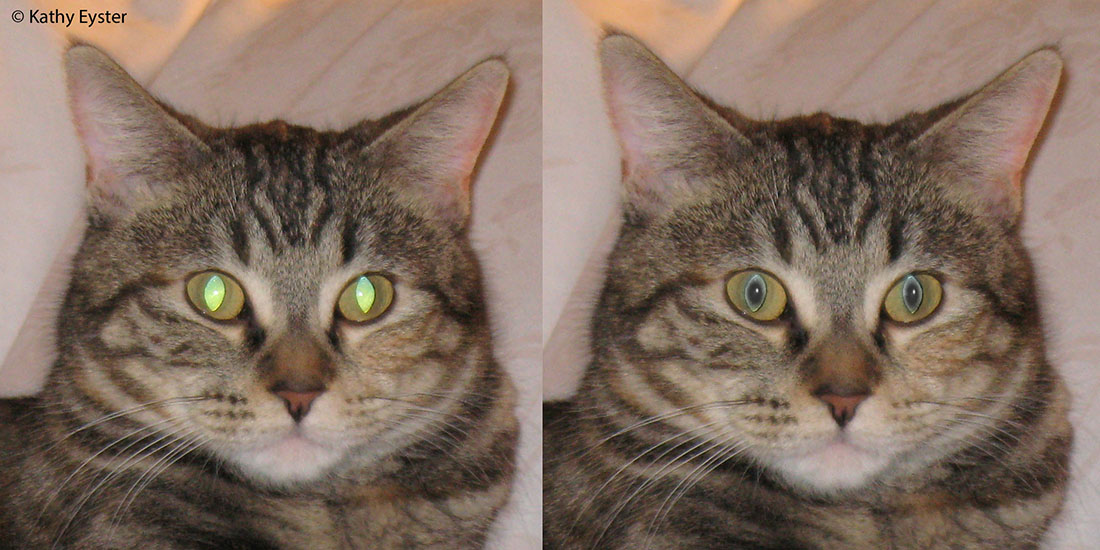 |
| Pet Eye Removal Tool does not work as well on pupils that are not round |
The best way to deal with pet eye is to avoid it altogether by turning off your flash and raising the ISO setting as I did in the picture below.
 |
Relying on natural light prevents any pet eye problems
1/15 second, f/4, ISO 400, image stablized lens | |
|