Cropping is probably the most fundamental photo editing step anyone can make. Cropping a picture can strengthen the composition and eliminate distractions. It can also change a horizontal picture to a vertical one (and vice versa) or turn a rectangular image into a square or panoramic format. Adobe includes a crop tool in all its photo editing programs. And the tool comes with some overlay options to help you with the design of your images.
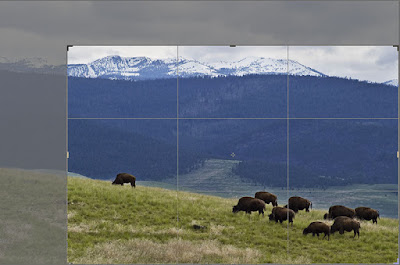 |
| Photoshop's Crop Tool showing the Rule of Thirds overlay |
Read more...
Photoshop Overlays
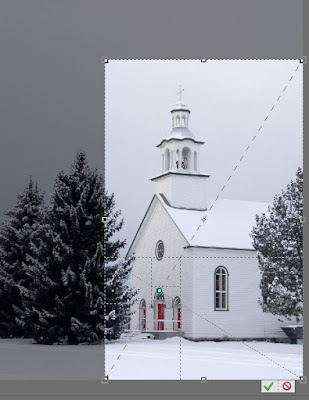
When you select the Crop Tool in Photoshop CC, a border with "handles" appears around the whole image automatically. In earlier versions of Photoshop, you first need to click and drag a rectangle around your photo to see the handles.
To see the overlay, you must use the handles to change the cropping frame to something smaller than the entire photo. Then you have six different styles of overlay patterns to choose from:
- Rule of Thirds
- Grid
- Diagonal
- Triangle
- Golden Ratio
- Golden Spiral
 |
| Rule of Thirds Overlay |
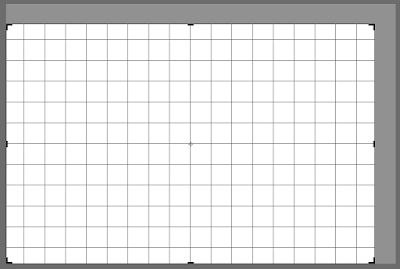 |
| Grid Overlay |
 |
| Diagonal Overlay |
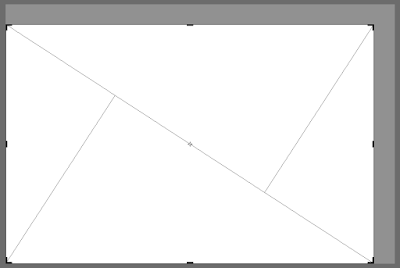 |
| Triangle Overlay |
 |
| Golden Ratio Overlay |
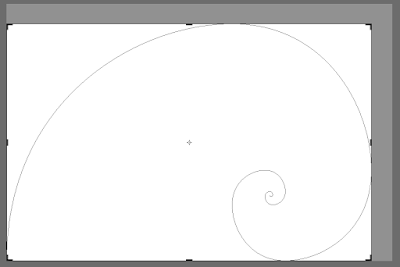 |
| Golden Spiral Overlay |
You can cycle through these different choices by selecting them from
the small "grid" icon in the options bar. Or you can press the letter "o" keyboard shortcut to see the different choices.
In addition, you can tell Photoshop whether to automatically, always or never show the overlay. If you choose Auto, an overlay appears only when you start to drag one
of the sides or corners of the cropping frame in from the edges. If you select Always, the last overlay design you selected appears as soon as you select the Crop tool. If you choose Never, you won't see any overlay lines, in case you find them distracting.
If you frequently use
Adobe Camera Raw to edit your photos, the only overlay available is the Rule of Thirds. To turn it on, click and hold on the Crop tool icon in the toolbar and select "Show Overlay." Do the same thing to hide the overlay lines.
Lightroom Overlays
In Lightroom, the Crop tool in the Develop module has the same overlay choices as Photoshop. Lightroom includes one additional overlay option that displays three
common print proportions: 2x3, 5x7 and 4x5. This can be helpful if you
want to crop to fit a particular frame size. For example, referring to the 4x5 overlay line will help you crop for an 8x10 inch print.
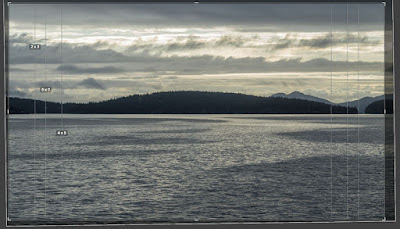 |
| Lightroom's print proportions overlay for the Crop Tool |
Pressing the letter "o" displays each one in turn. From the Tool Overlay drop-down list in the toolbar below the image, you can also choose to automatically, always or never show the lines.
Elements Overlays
Starting in version 11, the Crop tool in Elements also has overlay options for the Rule of Thirds, a Grid, the Golden Ratio (a combination of the Golden Section and the Golden Spiral found in Photoshop and Lightroom), and no lines at all. Elements 13 also provides crop suggestion icons. All these are available in Expert edit mode in the Tool Options panel at the bottom of the screen.
 |
| Golden Ratio overlay for the Elements Crop Tool |
Cycling through the different overlays gives you an idea of
the variety of designs you can use. Once you have the overlay display you prefer, you can use the
lines as guides to the main subject's position in the newly cropped
picture. Usually, the most important subject is placed where the lines
intersect. The Grid overlay is most helpful when you are straightening a picture at the same time you are cropping it. Experiment with this display option to see if it helps you improve the composition of your photos.


